
After a break of nearly a year I have now finished the next part of my 10mm AWI forces for Guilford Courthouse. I finally finished the British last year, so now its the turn of the gallant Patriots fighting against tyranny, oppression and for the right to super size meals.

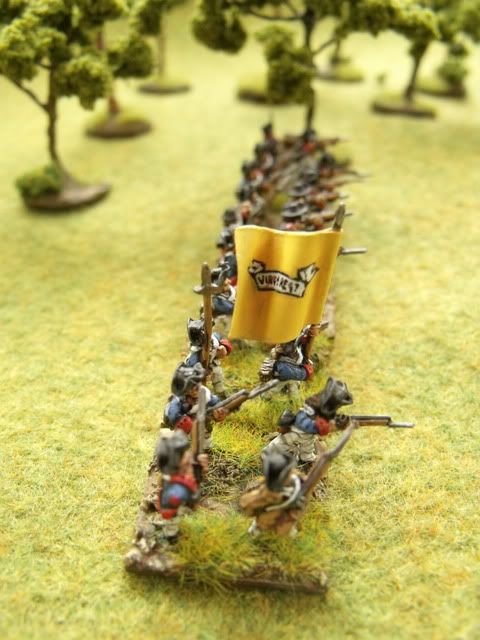
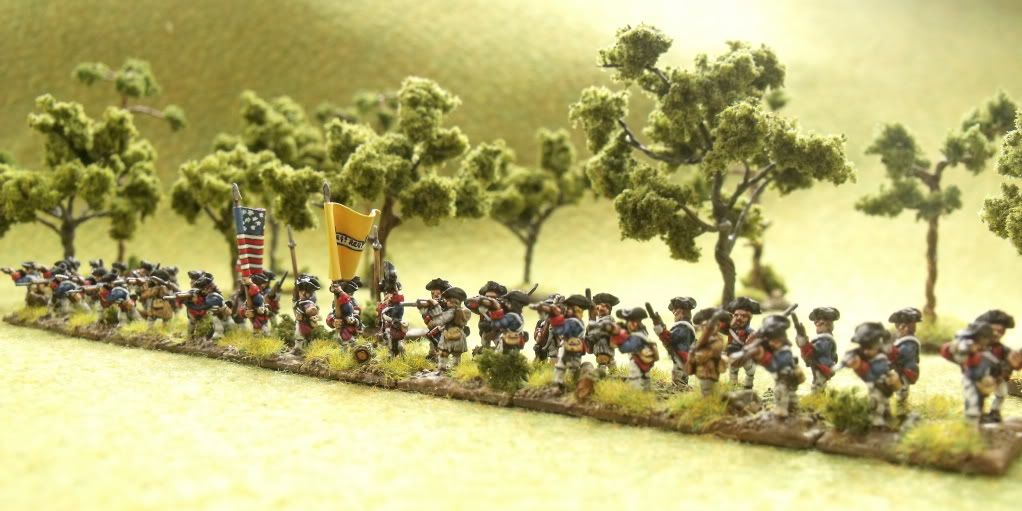
First under the brush are the Virginia Continental regiments. There were two regiments at Guilford Courthouse which seem to have different numbers in every reference book, but I'll go with Babits* and use them as the 1st and 2nd Virginia. I have been constructing my forces using the order of battle in the original British Grenadier rulebook which used a 1:20 ratio - meaning if I can get away with each regiment being about 20 figures. The new scenario book has scaled the battle up to 1:10. I decided therefore to arrange the figures so they could be used as 2 smaller regiments at 1:20 or one larger at 1:10 in case I ever get round to painting enough figures for the larger battle (i.e. never)
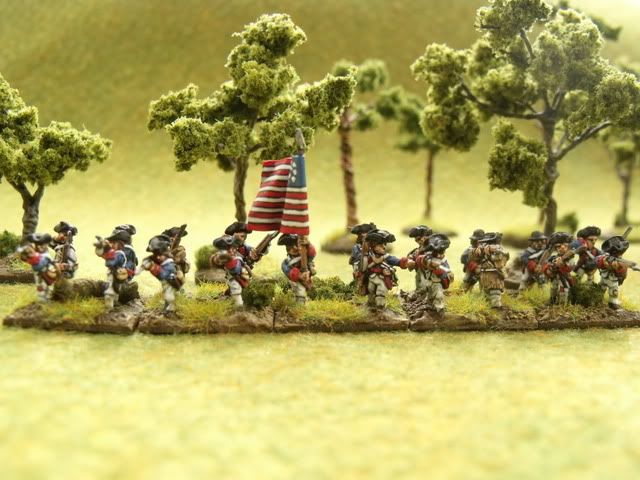

One advantage of painting up the Americans is that you pretty much have free reign on how to paint the uniforms and flags since they were anything but standardised. This also means needing to put a bit of thought into it rather than just following an Osprey guide. I have decided to give each of my American regiments their own flavour. For the Virginians I latched onto a passage in Babits which mentions that they had received a new batch of poor quality uniforms prior to leaving Virginia. I decided therefore to paint them up in relatively uniform blue coats but have a number of them patched on the knees and sleeves. In the end they probably still look a lot less scruffy than they would have done in actuality (I'm going to save proper scruffy for some of the militia!).
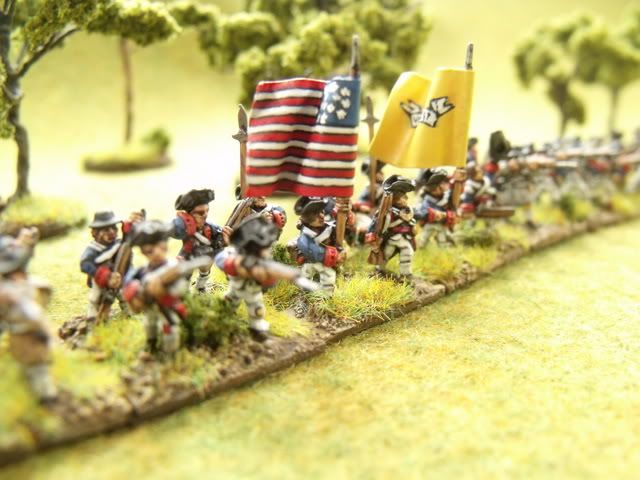
The flags are also entirely conjectural. The best work on flags is Richardson but even this is incredibly vague. I knew I didn't want a Betsy Ross so I have just used a random Stars and Stripes design. The regimental colours are entirely made up. There are some Virginia State flags using a buff background so I made the flag with a plain buff yellow field and a simple scroll device. I have had comments that painting 10mm flags is borderline insane, but it really is quite straightforward (and probably easier than larger scale flags). This time I've included a step-by-step to show how I went about them
Step 1:


First you need a template on a piece of paper. I use standard printer/copier paper. It needs to be absorbent to make the glue work (see below). You could hand draw the template entirely. I prefer to print a base template for somewhere like Warflag. Print it down in black and white and resize as appropriate. It is better to use the resize function in your printer driver or photocopy the size down. I find using an art package to rescale can cause the image to become 'blocky'. For these flags I used a Stars and Stripes template from Warflag and a standard blank template that I have used for other flags previously. At this point make sure that the flag is the right size to fit on your flagpole!
Step 2:


Now blackline all the detail. I used a Rotring 0.1 pen. It needs to be a waterproof ink. Don't worry if the detail becomes smudgy at this point. Extend border the lines beyond the boundary of the flag - this will help to guide cutting later.
Step 3:


Paint in the base colours using a shade colour. Paint up to and slightly over the blacklines so that you leave the finest black line bordering each colour. Don't put the paint on thickly otherwise it risks cracking when the flag is bent later.
Step 4:


Paint a mid tone colour to fill most of the shade colour blocks already done. You may need to repeat if the brushstrokes are still visible when dry. At this point I also used a Rotring 0.03 pen to write the slogan on the scroll. In hindsight I should perhaps have used this fine pen to outline the stars.


 Step 5:
Now cut out the flags using a sharp scalpel and a metal ruler. I have one of those paper cutters that combine a blade into a sliding ruler but it's not necessary. When the flags are cut out, paste the reverse sides generously with a PVA/Water mix. Wrap the flag around the flagpole and match the two halves carefully. While the flag is still wet, get a thin paintbrush handle or similar (a knitting needle is good if, and only if, you have permission!). Bend the flag around the handle 2 or 3 times to create furls - the paper should bent stay in place. It looks more realistic to furl on the diagonal rather than straight up or down. If you are brave you can scrunch the flag up quite severely..... I wasn't! Leave to dry overnight and then varnish to give the flag some strength and you're done.